Company Logo

OMNIcheck Installation Guide

This wizard guides you through Hardware setup and Software installation.

OMNIcheck Installation Wizard

Company Logo

Step 1: Unbox & Verify Contents

Make sure all items are present before you continue:

  • OMNIcheck unit & Headform
  • Power Assembly & Cord
  • Two USB-A cables (Grey & Black)
  • USB-A Hub & USB-A Hub power cord
  • Microphone
  • Orifice
OMNICheck with all accessories laid out

Step 2: PC Requirements

Please confirm the PC meets the minimum specs:

  • CPU: Intel Core i5 (12th Gen) or equivalent
  • RAM: 16 GB
  • Storage: ≥ 2 GB free SSD space
  • USB: 3 total ports (≥ 1 USB-A)
  • Network: Internet access recommended
  • OS: Windows 10/11

Step 3: Connections

  • Connect the Black USB cable from the top rear USB port on OMNIcheck → PC USB port.
  • Connect the Grey USB cable from the bottom rear USB port on OMNIcheck → USB Hub.
  • Plug the USB Hub power cord into a PC USB port.
  • Connect accessories (e.g., Microphone, optional RFID Reader) to the USB Hub.
OMNICheck cabling diagram showing grey and black USB connections, hub power, and accessories

Report an Issue

Having trouble? Report your issue using the Links below.

Step 1: Locate the Installation Files

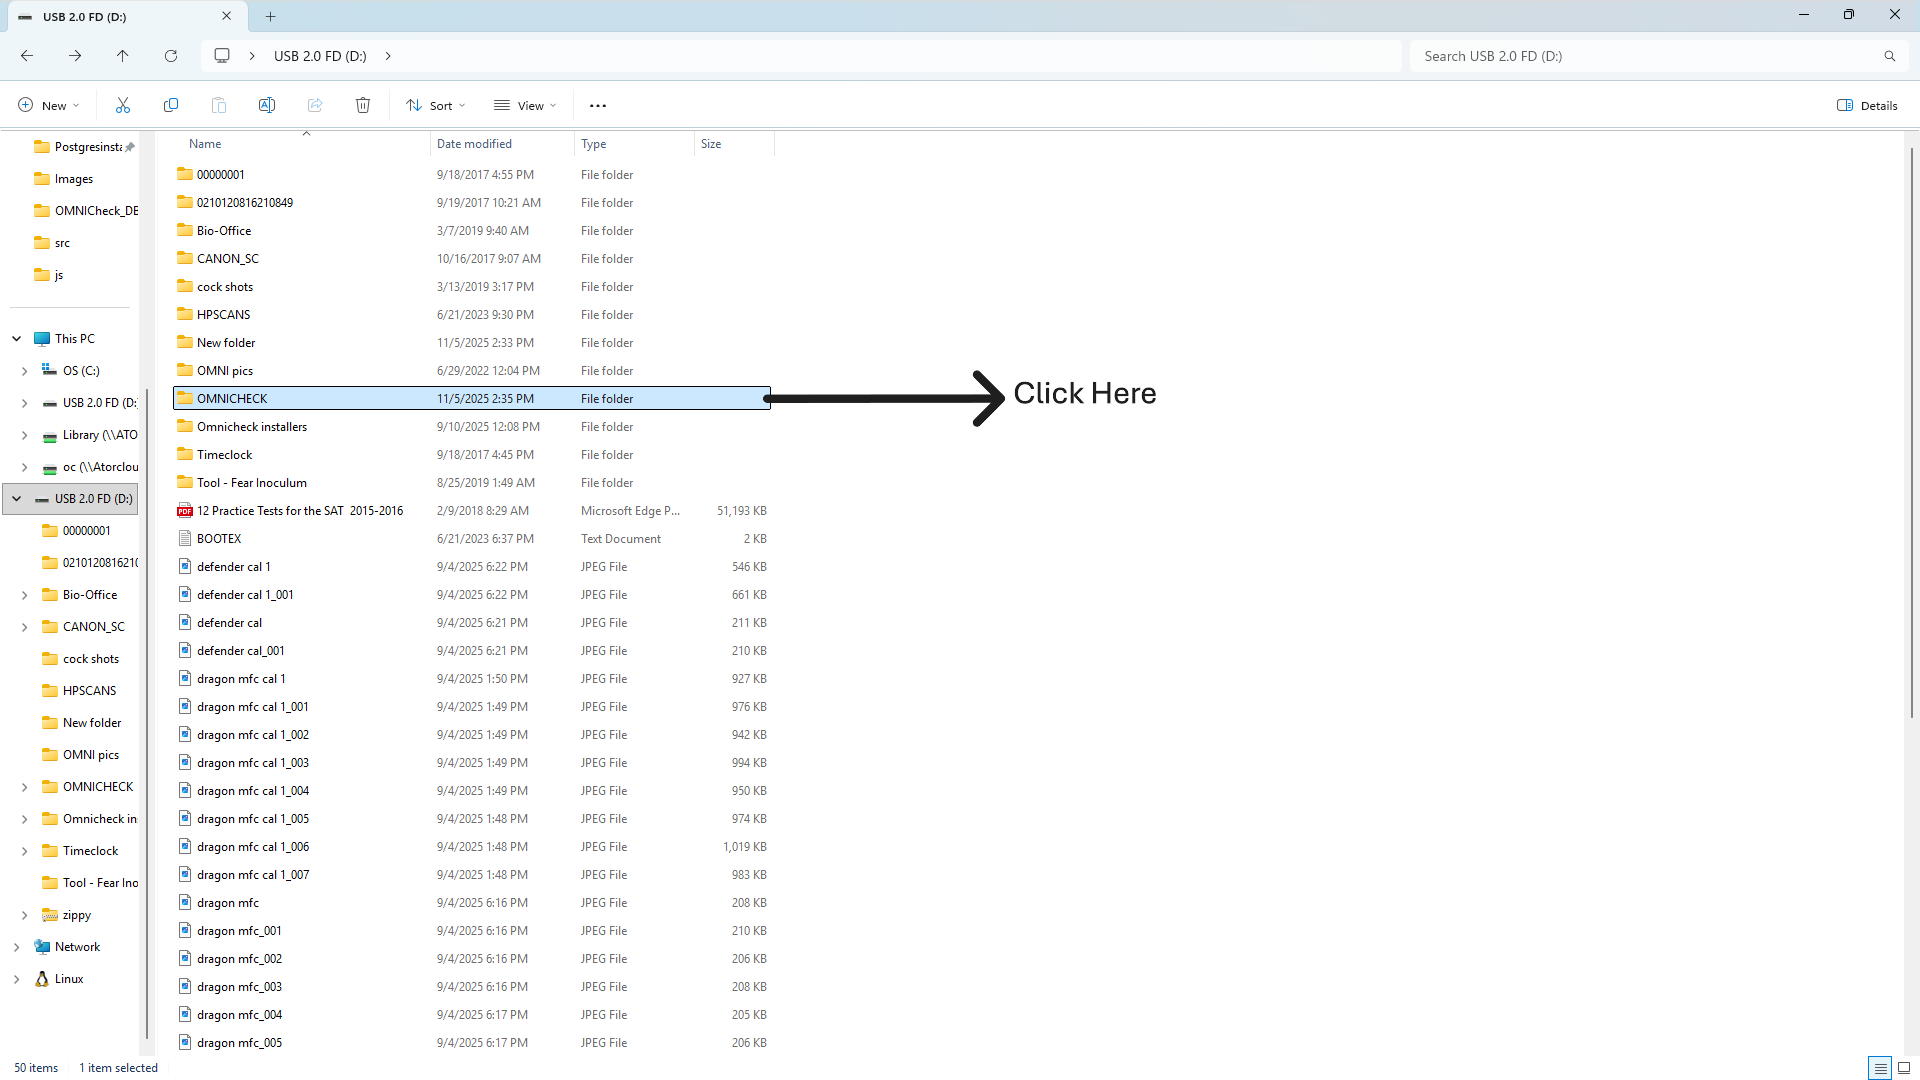
Before starting the installation, ensure you have access to the installation files. These are stored on the USB drive that comes with your OMNICHECK system.

  • Connect the USB hub from the OMNICHECK hardware to your computer.
  • Open This PC or File Explorer and locate the removable drive labeled USB 2.0 FD (D:) or similar.
  • Inside the drive, Find and Open the folder named OMNICHECK and Open the folder named OMNICHECK 2025 Q4 Installer.
  • Note: Folder and file names may differ if installing a newer version of the software.

Step 2: Run Installer as Administrator

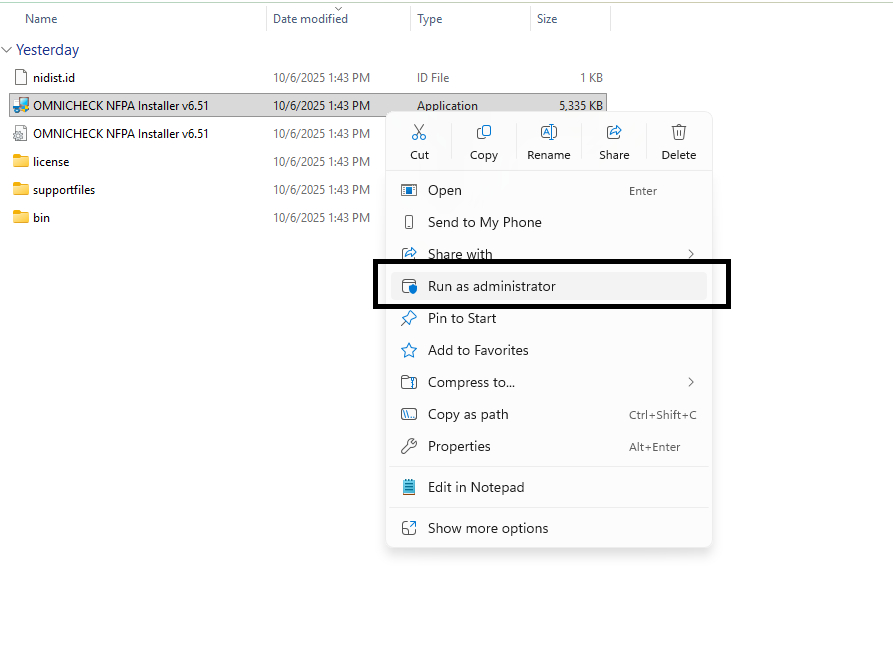
Right-click the installer and choose Run as administrator.

Run as administrator

Step 3: Destination Directory

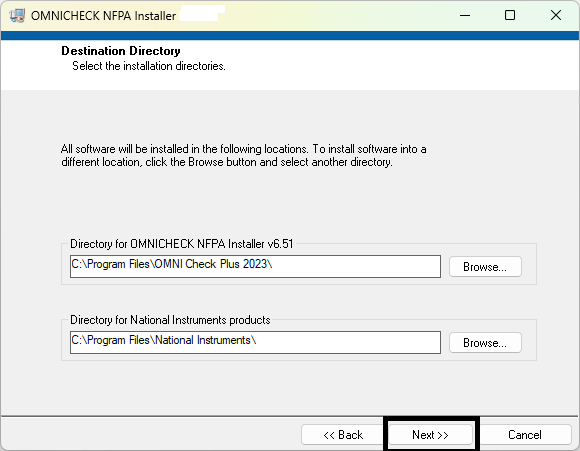
Select Install locations, then click Next.

Destination Directory

Step 4: License Agreement (ATOR Labs)

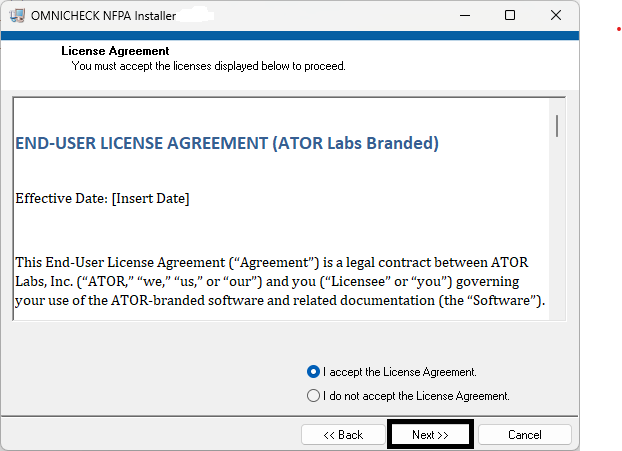
Review and accept the ATOR Labs license agreement. Click Next to Continue.

OMNICHECK License Agreement

Step 5: License Agreement (National Instruments)

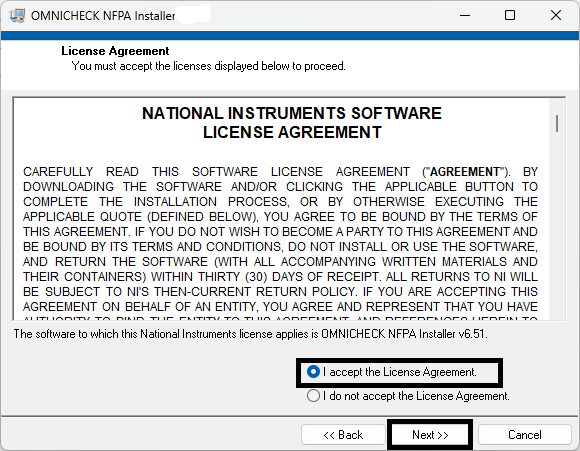
Review and Accept the National Instruments software license agreement. Click Next to Continue.

NI License Agreement

Step 6: Start Installation

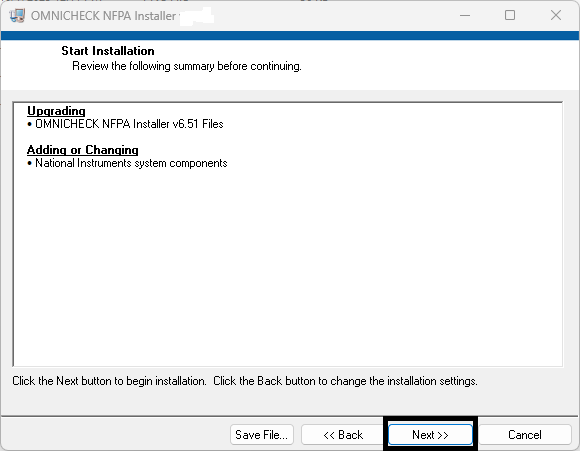
Review the summary and click Next to begin.

Start Installation

Step 7: Installation Complete (Base Installer)

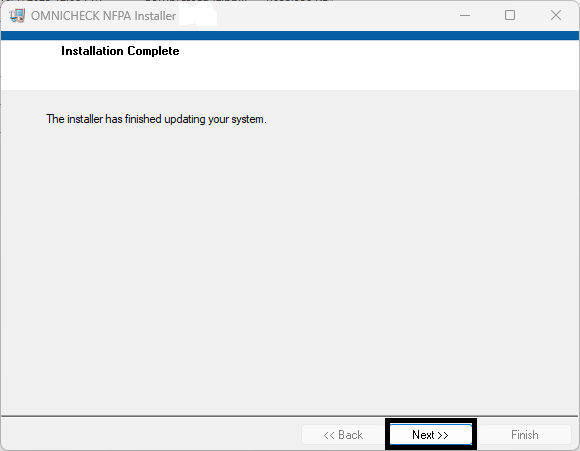
Base Installer has finished updating your system. Click Next.

Installation Complete

Step 8: OMNIcheck Database Runner – Ready to Install

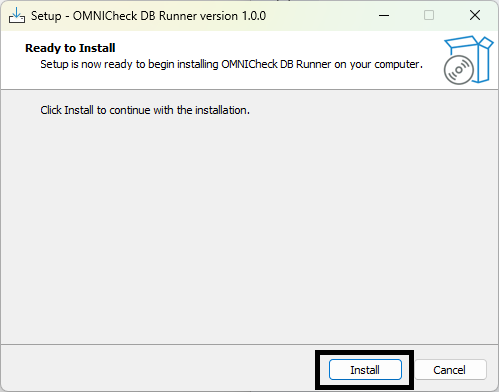
Click Install to continue with OMNIcheck Database Runner.

Database Runner Ready

Step 9: Installing PostgreSQL & Components

Do not exit from the process. Please wait as PostgreSQL,psqlODBC Installs. It may take 45 minutes to complete the Installation Process.

Installing Components

Step 10: Driver Installation(ODBC)

Press any key to continue to next backup process.

ODBC Driver Install

Step 11: Restore Databases

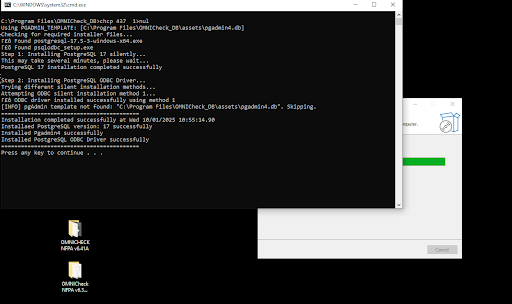
Press any key to continue and Finish the Backup Process.

Restore Databases

Step 11: Finalize & Finish

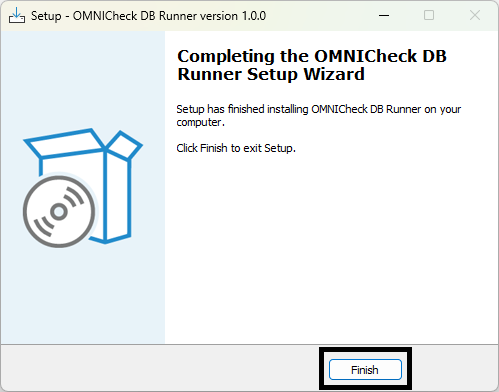
Click on Finish to Complete the Installation Process.

Final Step (placeholder)

Step 1: Restore the Backup Using the Script

  • Copy yor_Legacy_database_name.backup into C:\omicheck\Legacy\
  • Double-click legacy_backupscript.bat to run it
  • The script automatically begins restoration
  • Wait for “Restore completed successfully.”
Running legacy_backupscript.bat restoring database

Do not close the window while the process runs.

Step 2: Import the Legacy Data into the OMNICHECK Database

  • Run the “OMNICHECK Software".
  • Once open, locate the Active Database field.
  • Click on the Setup ⚙️ Icon next to the Active Database field to open the configuration panel.

Step 3: Create a New Asset Database

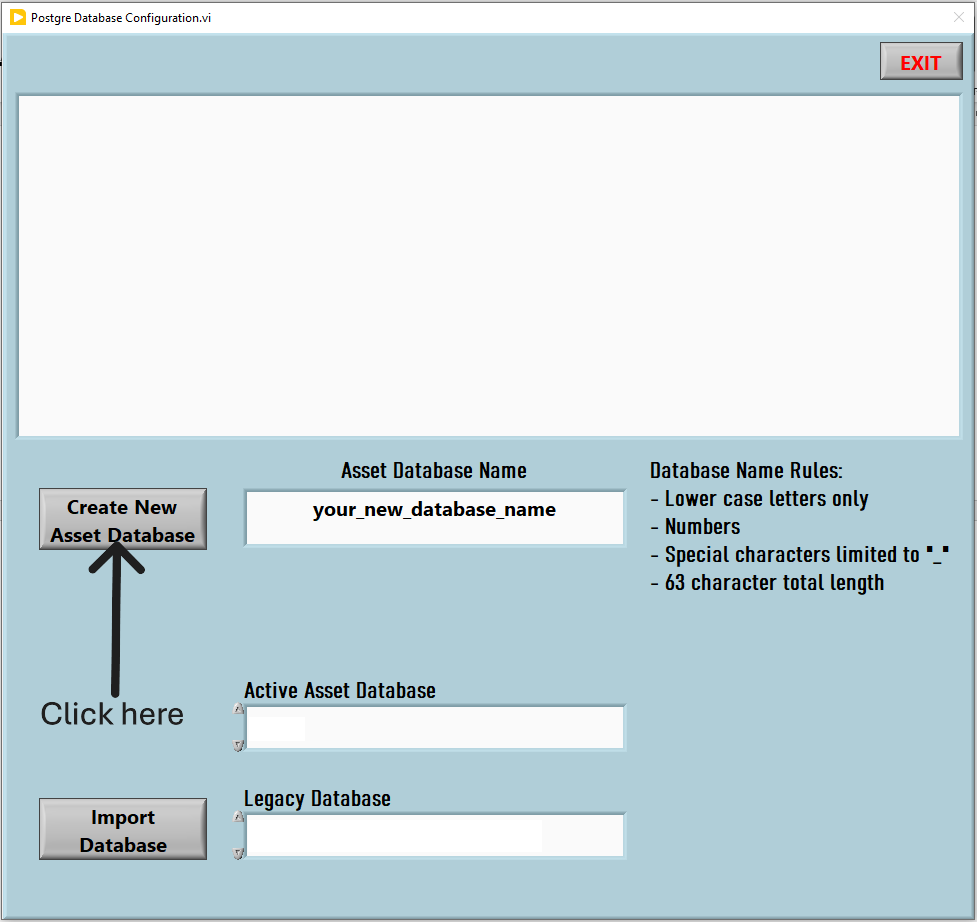
Choose a name for your new asset database and click "Create New Asset Database".

Create New Asset Database interface

Step 4: Configure and Import Databases

  • Select the Active Asset Database you want to import data into.
  • Select the Legacy Database you want to import data from.
  • Click the “Import Database” button to begin the process.
Postgre Database Configuration showing Active and Legacy database import screen

⚠️ Important Notice Before Software Installation

Please read this carefully before proceeding.

  • Installing or reinstalling PostgreSQL on a machine that already has an existing PostgreSQL installation may overwrite or corrupt existing databases.
  • If you have an existing PostgreSQL database, make sure you have created a backup (.backup file) using pgAdmin before continuing.
  • Store your backup safely in a separate folder (recommended: C:\Backup).
  • Only continue when your backup is confirmed and verified.

Step 1 : Create a .backup File Using pgAdmin

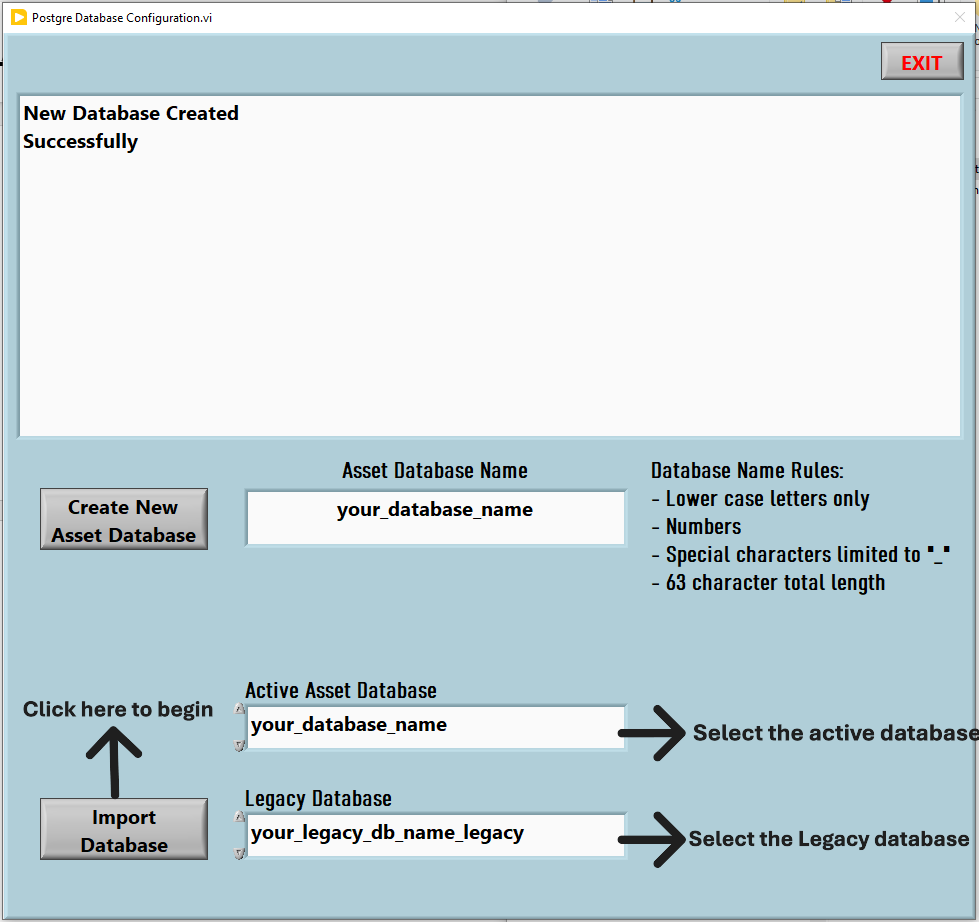
Purpose: Export your previous (legacy) database used until now from the older PostgreSQL system.

  • On your legacy machine, open pgAdmin 4
  • Right-click your previous (legacy) databaseBackup…
  • Click the folder icon on the right side of the filename field
  • Change the "Save as type" to .Backup
  • Save as C:\omnicheck\Legacy\Your_legacydbname.backup
  • Click Backup and wait for confirmation
pgAdmin backup dialog selecting Custom .backup format

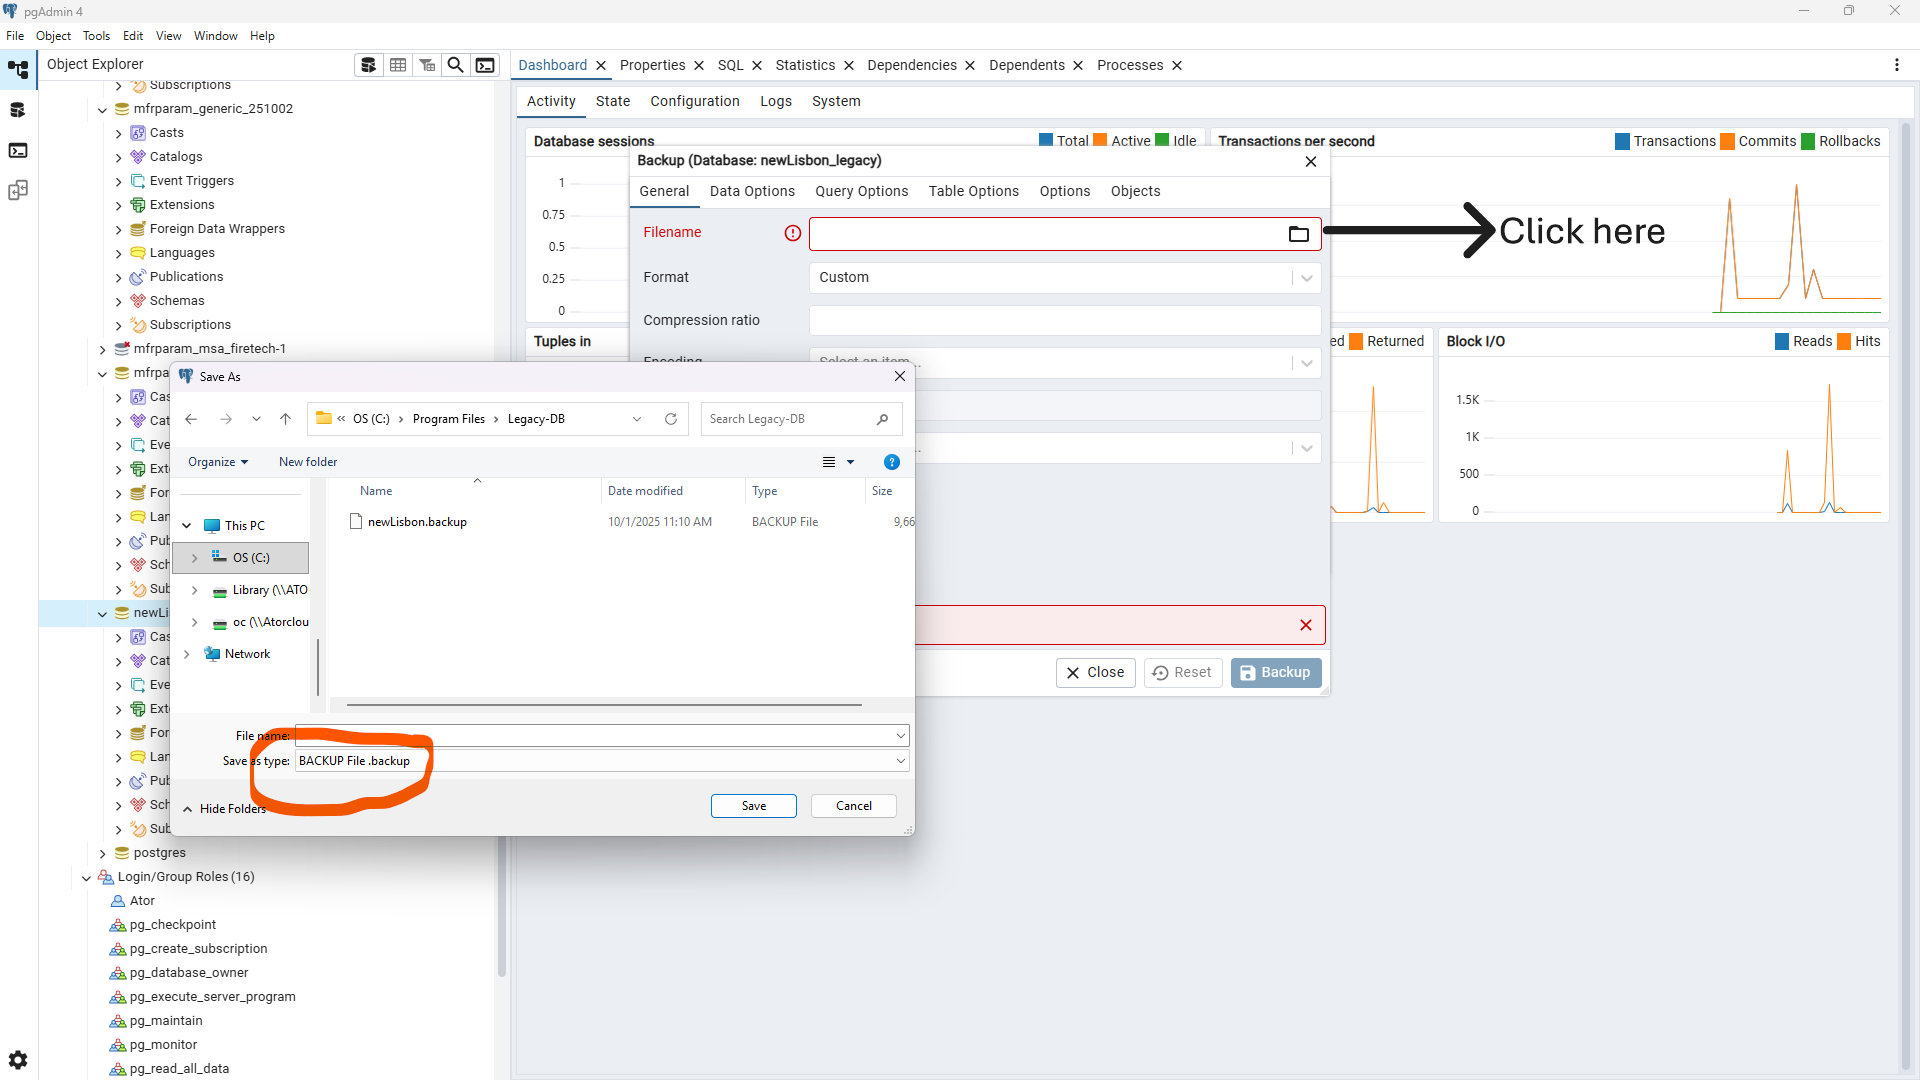
You now have a portable .backup file ready for migration.